How to make your voice sound better
Learn how to make your voice sound better by using expert tips to improve your audio post-production skills, with the help of audio engineer Jairo Pineda and helpful video tutorials!
How to make your voice sound better
To help you learn how to make your voice sound better, we’ll be covering the topics below in greater detail. We also have video tutorials from our “How to edit voice overs” series.
Voice123’s Customer Success team has been assisting voices actors not just with customer service but also by troubleshooting audio issues and addressing related concerns. We’ve noticed some common issues on the topic of how to make your voice sound better. So, with the help of audio engineer Jairo Pineda, we’ll be providing helpful post-production tips and tricks to make your voice sound better!
Jairo Pineda
Post Producer, Musician & Audio Engineer
Work experience: Spotify, Pandora, Netflix, Publix, Disney.
Specializes in: audio restoration, radio tag mixing, post-production for TV and cinema, music production, Binaural 3D sound.

Before diving in, please allow us to stress:
- This is not a one-size-fits-all industry. Not all voices benefit from the same processes. Some recording techniques are more useful than others. And some audio post workflows will suit you better than others.
- It’s about the processes, not the tools. It’s more important to understand the concepts of what you are doing. Whether you’re using Audacity, Ableton, Pro Tools, Audition, Reaper, or even GarageBand; tools are only as good as your application.
- Planning is key. By recording in the best environment possible and with proper technique, you can eliminate the need for extra work during post-production. Always address the cause, not the symptom.
- Invest in yourself. Honing your craft means investing in yourself through education, equipment, workshops, coaching, etc.
With that said, let’s get to it!
What’s the difference between editing, mixing, and mastering?
- Editing is the clean-up process. It’s removing unwanted silences and noises, deleting mistakes, removing breathing noises, and so on.
- Mixing is when you set volume levels (and stereo placement, if applicable) correctly. This allows all the individual elements to come together like pieces of an audio puzzle.
- Mastering is when you apply finishing touches to the whole project. Such as EQ, compression, normalization, and limiting. While some of these processes may be involved during mixing, they enable everything to fit together seamlessly. It also ensures that your finished recording meets all the necessary technical and quality specifications like digital format and overall volume.
How to make your voice sound better by reducing mouth clicks
Mouth clicks are noises that naturally occur in our mouths, especially when they’re dry. They happen as our tongue, teeth, and saliva interact. This causes little slaps, clicks, and pops. It’s always better to try and avoid, or at least lessen them before the recording process even starts. The solution is to make sure you’re really well hydrated. Also, avoid drinking beverages like coffee just before you record. Certain types of medication can be a problem too. There are many potential remedies, but they don’t all work for everyone.
Tips and tricks to reduce mouth clicks in your recordings
1. Drink plenty of water at least 2 or 3 hours before recording. Keep a glass of water handy.
2. Avoid drinking diuretic beverages such as soda, coffee, energy drinks, or tea.
3. Avoid smoking.
4. Drink sips of water in between takes and phrases to keep hydrated.
5. Mic positioning and vocal projection can help reduce mouth clicks.
Additional Reading
The secret to preventing mouth clicks – Gravy for the Brain
Producing professional voice overs at home – Pt. 1 & 2 – Sound on Sound
If there are audible tongue slaps, mouth clicks and pops in your recording, you’ll have to carefully edit them out. Here’s how:

How to make your voice sound bettter by reducing plosives
‘Pops’ are caused by plosive consonants like p, t, or k. They happen when a rush of breath hits the mic’s capsule because of the lack of a pop filter. Or using an inadequate one.
Practice and perfect the production of plosive consonants by positioning the lips so you force your escaping breath downwards rather than straight at the mic. It takes getting used to and you have to practice it well. Otherwise, your plosives will always sound strained or tentative.
A great exercise is to practice talking with a pencil in your mouth. This helps to project your breath to the sides of your mouth.
Tips and tricks to reduce plosives in your voice over recordings
1. Nothing beats a good pop-filter and no voice actor should record without one! The mesh is designed to prevent plosives from reaching the mic capsule by effectively dispersing your breath. Double-layered pop filters are recommended, as they work better than single-mesh or a punched-metal one.
2. Practice your pronunciation by trying to redirect the airburst to the sides of your mouth instead of to the front.
3. Move your head slightly away from the mic capsule when pronouncing plosive consonants, so that the mic doesn’t pick up the airburst. This takes practice so you don’t go off-mic.
If you still end up with ‘pops’ in your recording, you can reduce or remove them with careful editing. Here’s how:
How to get rid of sibilance
Sibilance is the excessive high frequency sound that’s produced with letters like ‘s’; it’s that hissing ‘s’ sound. It’s the result of a combination of factors involving your lips, tongue and teeth, and can be worsened if you have a lisp. You can reduce sibilance by adapting your recording technique in front of the mic.
Tips and tricks to get rid of sibilance in your voice over recordings
1. Move your head away ( mouth approx. 1 inch to the side) from the mic capsule when pronouncing an ‘s’ sound.
2. For some, placing a popsicle stick vertically in front of the mic capsule can slightly disperse the incoming air and reduce the sharpness of the hiss. But this doesn’t work for everyone!
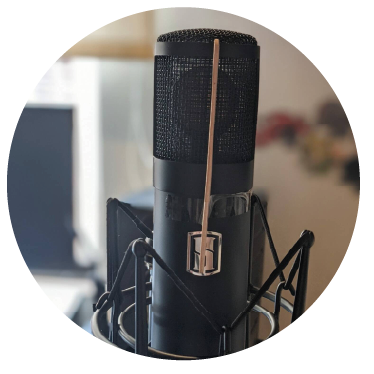
If you end up with troublesome sibilance in your recording, you can reduce it while editing. Here’s how:

How to remove breathing from audio
Breathing is vital. But breaths can be intrusive and distracting in voice overs. Soft, gentle breaths are fine, but loud harsh breaths can really irritate a listener.
As always, it’s best to address this issue while recording. Adding to our ‘move away from the mic’ tip, we also suggest breathing exercises.
Tips and tricks to remove breathing from audio
1. Practice breathing softly and gently. And avoid sharp intakes of breath.
2. Start breathing from your diaphragm. This will give your voice the support it needs for better endurance, projection, and tone.
Additional information on how to make your voice sound better
Tara Platt and Yuri Lowenthal explain diaphragmatic breathing on Voice over voice actor.
If you find there are troublesome breaths when you listen back to your recording, you can either reduce or remove them while editing. Here’s how:
How to remove background noise from audio
Background noise comes from external sources like lawnmowers, cars, airplanes, children, dogs, air conditioners, computer fans, etc.
Rumble is created by vibrations and movements. In some cases, these can be the result of traffic passing by. Or if you move your mic stand or cable while recording. Figuring out how to make your voice sound better also involves limiting these noises in your recordings.
Tips and tricks to remove background noise and rumble
1. To reduce rumble, avoid contact with your mic stand or cable when recording. If you live next to a busy street, you’ll probably have to build an insulated false floor. Then you can set up your mic stand to isolate it from the floor vibrations.
2. Another factor indirectly related to how to make your voice sound better is eliminating background noise. So be sure to record in a silent room. And aim to have your computer in another room or far away from your recording space to limit the amount of fan noise. Be sure to remove any electric devices that can produce unwanted noise. You can check out our ‘equipment for a home studio set-up’ post for more information on acoustic treatment.
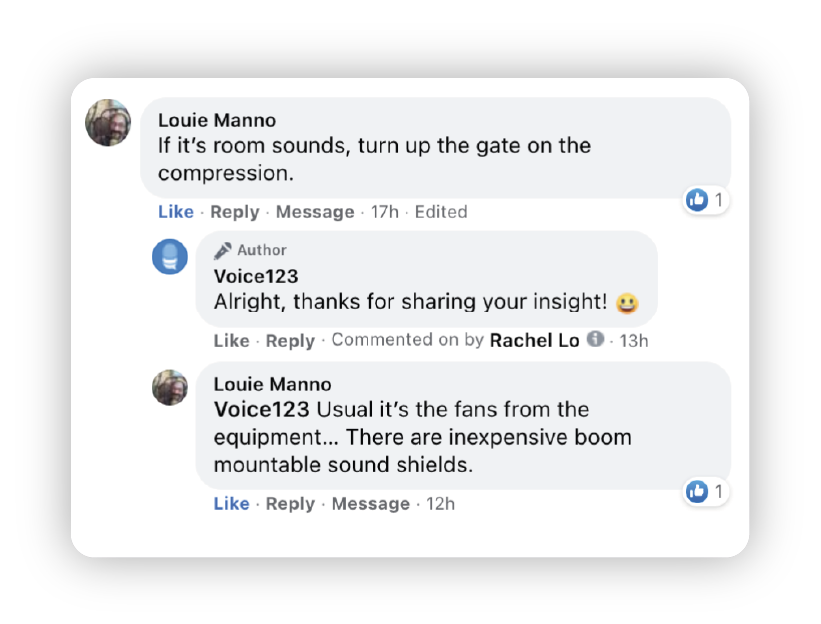
If, despite your best efforts, you have rumble and background noise in your recording, you can reduce them. Here’s how:
Audio post production is not one-size-fits-all
These tutorials are not meant to be a comprehensive audio post-production guide. We’re simply addressing the most common concerns our team helps with.
Learning how to make your voice sound better might require more time than you were hoping to invest. But you’ll be glad you made the effort to improve the quality of your recordings as it will help you stand out from the crowd. After all, it’s sincere care and customer service that gets you repeat clients and referrals!
Boost your voice over work opportunites with a paid Voice123 membership
First-time paying members are eligible for a discount
Share this post!
A blog owner yourself? Relevant links to quality sites will help your performance on search engines. If your readers will benefit from the services or information on The Booth's Voice over Guide, please consider linking to this post or the guide itself.

